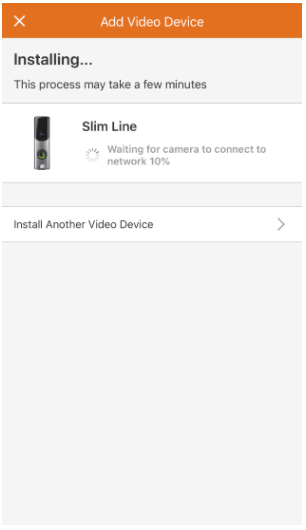
These instructions show how to add an installed video doorbell to through the customer App. Select Add a New Doorbell Camera
In the Customer app:
- Tap
 .
. - Tap Doorbell Camera. Alternatively, use the Customer app Video Installation Wizard to enroll the Doorbell Camera.
Note: If you do not see the Doorbell Camera option in the menu, the Doorbell Cameras service package add-on needs to be added to the account. You may also need to verify the customer’s login permissions to ensure the login being used has permission to add a Doorbell Camera. - Tap
 to begin the installation.
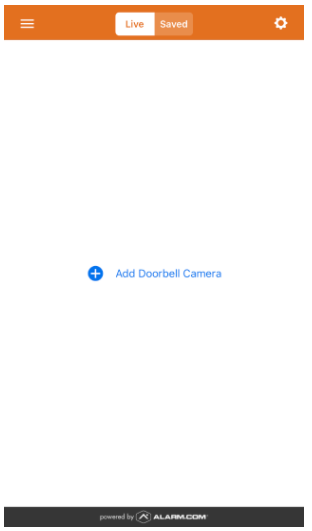
Note: If a Doorbell Camera is already installed on the account, to add a new Doorbell Camera tap on the Doorbell Camera’s page, and then tap Add Another Camera.
Follow the on-screen instructions
Keep your mobile device on the home’s Wi-Fi network (or on LTE) and follow the on-screen instructions.
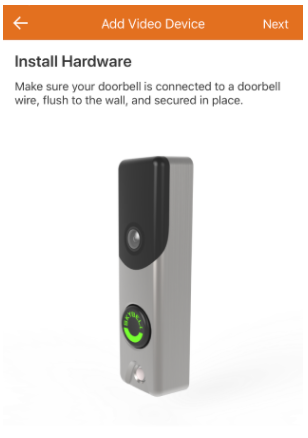
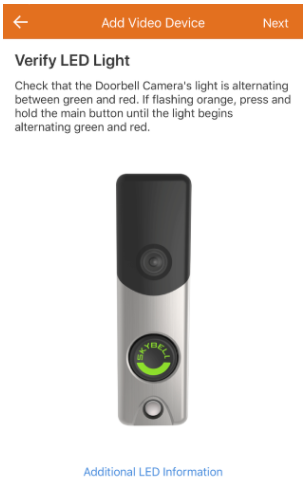
- The next pages will verify the hardware has been mounted and the LED is alternating red and green to indicate AP mode. Tap Next.
- On the Device Name page, enter a name for the Doorbell Camera.
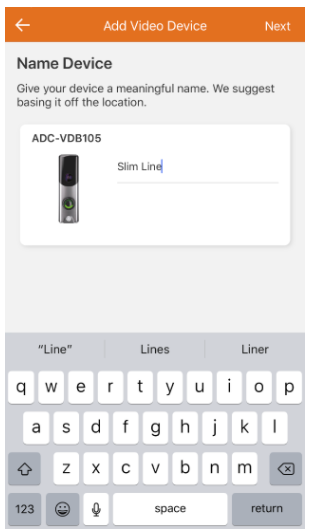
- Tap Next. The phone will begin to search for the Doorbell Camera's broadcast network.
When instructed, connect to the Doorbell Camera’s temporary Wi-Fi Network
The syncing process instructs you to connect to the Doorbell Camera’s temporary Wi-Fi network. The network is named Skybell_123456789 or SkybellHD_123456789, where 123456789 corresponds to the Doorbell Camera's serial number. The Doorbell Camera’s temporary Wi-Fi network is for the purpose of the installation process only and is not meant to provide Wi-Fi for internet access. During installation, there may be a message indicating that there is no Wi-Fi available but this is expected. Dismiss the message and continue to stay connected to the Doorbell Camera's temporary Wi-Fi during the installation process.
It is recommended to remain within six feet of the Doorbell Camera or Slim Line throughout the entire enrollment process to ensure the mobile device and the Doorbell Camera stay connected.
Note: If you do not see the Skybell network, verify the Doorbell Camera is blinking green and red to indicate it's in AP mode. The Skybell Wi-Fi network only appears when the Doorbell Camera is in AP mode.
If using an Android device and the app version is below 4.15.7:
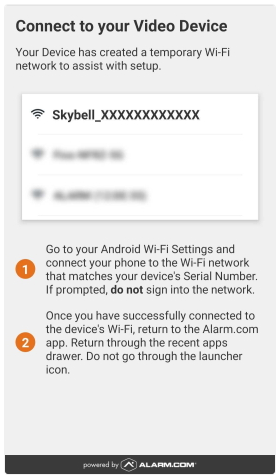
- Go to your Wi-Fi settings and select the network that matches the SkyBell Doorbell Camera's serial number.
Important: If prompted, do not sign into the network.
- Once you are connected to the Skybell network, return to the Customer app. Use the recent apps drawer (i.e., the task manager/list of currently open apps) to return to the Customer app instead of the launcher icon.
If using an Android device and the app version is 4.15.7+:
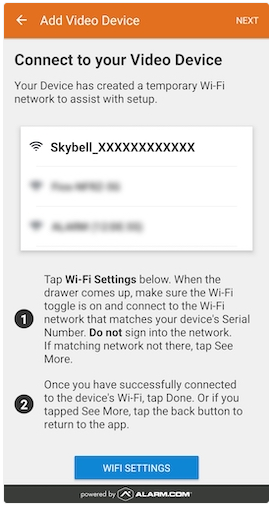
- Tap WiFi Settings. If the device's Wi-Fi is disabled, tap the toggle switch to enable it.
- Tap to select the network that matches the SkyBell Doorbell Camera's serial number.
- Continue the installation:
- For devices using Android 10+, tap Done.
- For devices using versions below Android 10, tap the arrow the in upper left to return to the app.
If using an iPhone or iPad:
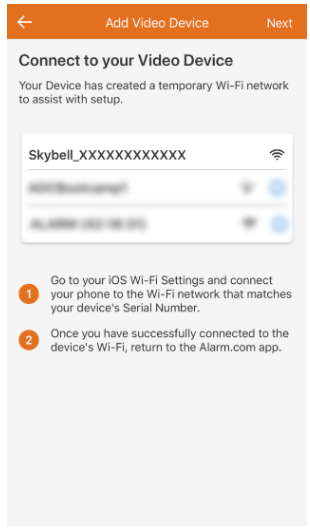
The Customer app prompts to:
- Leave the Customer app, then go to the phone's Settings app.
- Tap Wi-Fi.
- Tap to select the SkyBell network and wait until a blue checkmark appears next to the network.
- Once you are connected to the Skybell network, go back to the Building 36 Customer app to complete the installation.
-
Note: To verify that the iOS device is connected to the network, wait for 30 to 60 seconds for the Wi-Fi signal icon to appear at the top of the device.
Enter the home’s Wi-Fi information
Once the Building 36 Customer app finds the new Doorbell Camera:
- The Customer app prompts you to select the customer's Wi-Fi network that the Doorbell Camera will be connected to. The following image is an example of this process:

- When the customer's Wi-Fi is selected, very carefully enter the customer's Wi-Fi password.
- Though manual configuration is not recommended, there is the option to configure the Wi-Fi information manually. If you must configure static IP addresses or the customer has a hidden Wi-Fi network, tap Manual to manually configure the Wi-Fi information.
The following image shows the Manual tab.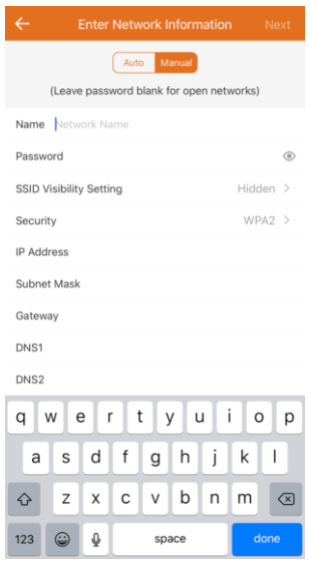
- Though manual configuration is not recommended, there is the option to configure the Wi-Fi information manually. If you must configure static IP addresses or the customer has a hidden Wi-Fi network, tap Manual to manually configure the Wi-Fi information.
- Once the Wi-Fi password is entered, tap Next to complete the Doorbell Camera configuration.
- Once the Doorbell Camera's configuration is complete, a Success message appears on the screen as shown in the following image. Tap Next to continue.
Enable push notifications & recording rules
The mobile device that is syncing the doorbell camera is automatically added as a notification recipient.
Enable the Digital Doorbell
If you installed a Digital Doorbell Adapter, the device must be enabled using the Building 36 Customer Website or app. The Digital Doorbell Camera setting controls the amount of time the power is made available to the chime to complete a ring cycle.
To enable the Digital Doorbell in the Customer app:
- Log into the Customer app.
- Tap Doorbell Camera.
- Tap
 .
. - On the Settings page in Chime, tap the Digital Door Chime toggle switch to enable it.
- Tap Save.