This article shows how to setup User Codes at the Enterprise Level. This is much more efficient than setting up codes at the Unit level and allows you to administer codes across an entire group. We recommend this with Residents and Vendors/Employees.
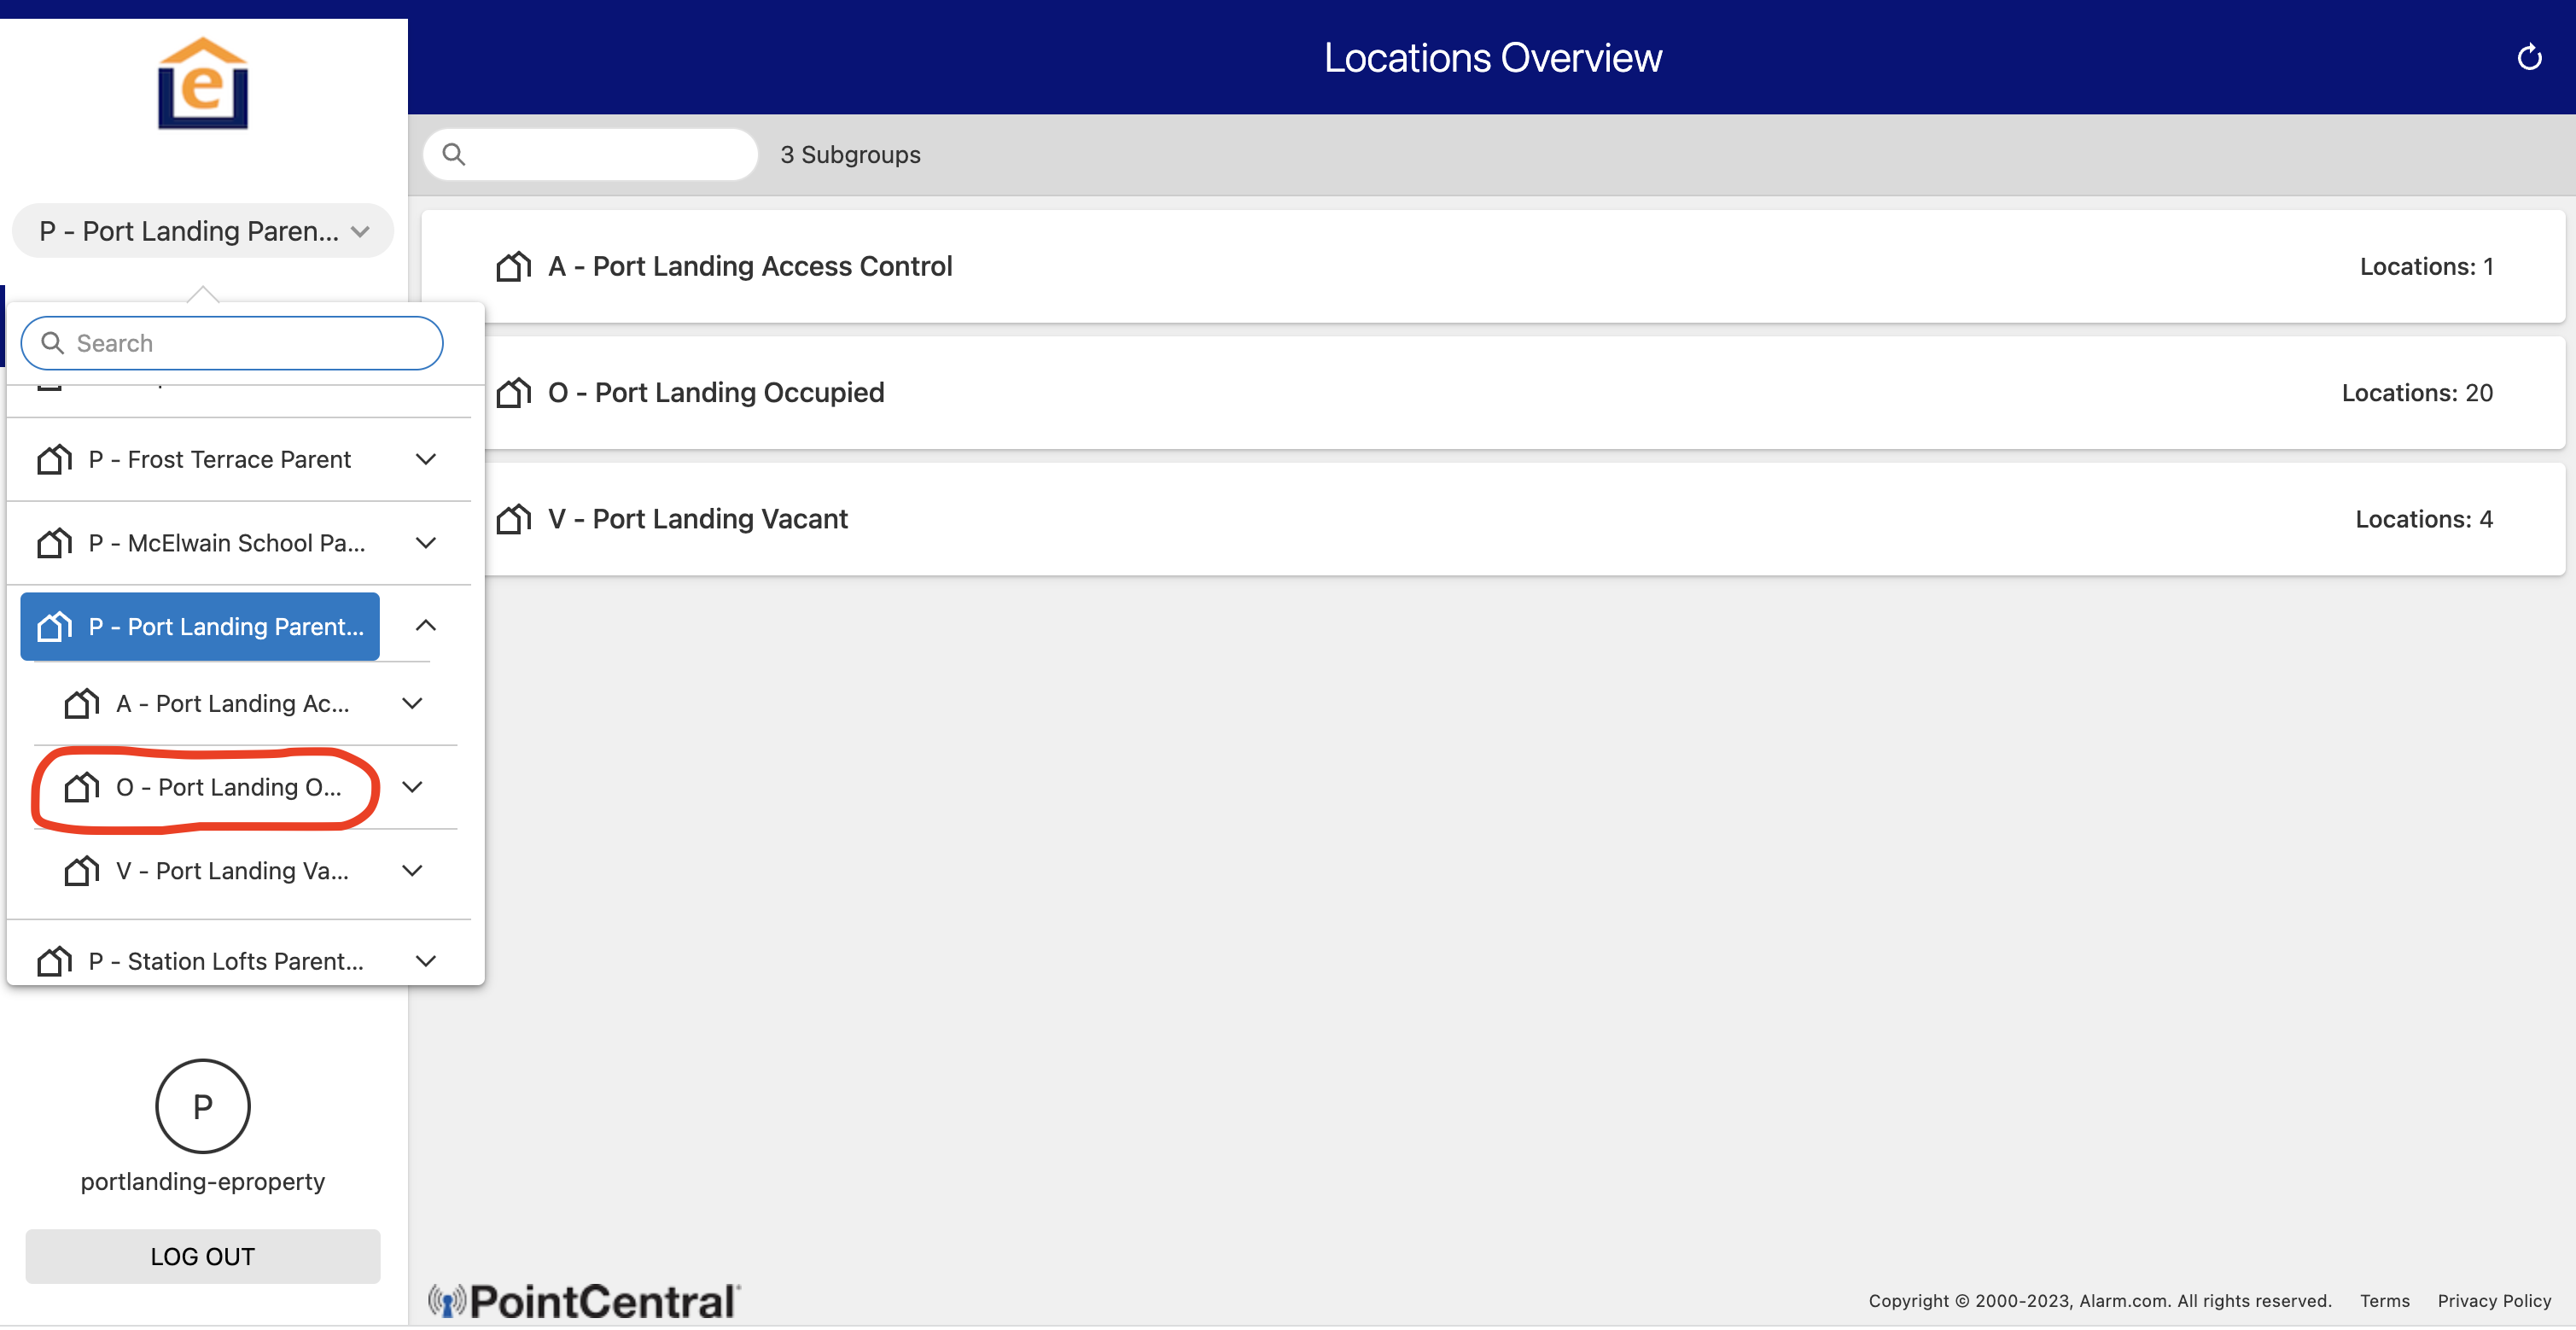
1. Login to PointCentral.com and select your community. Enter the Occupied Group (note the Two Houses side by side - this indicates Group level)
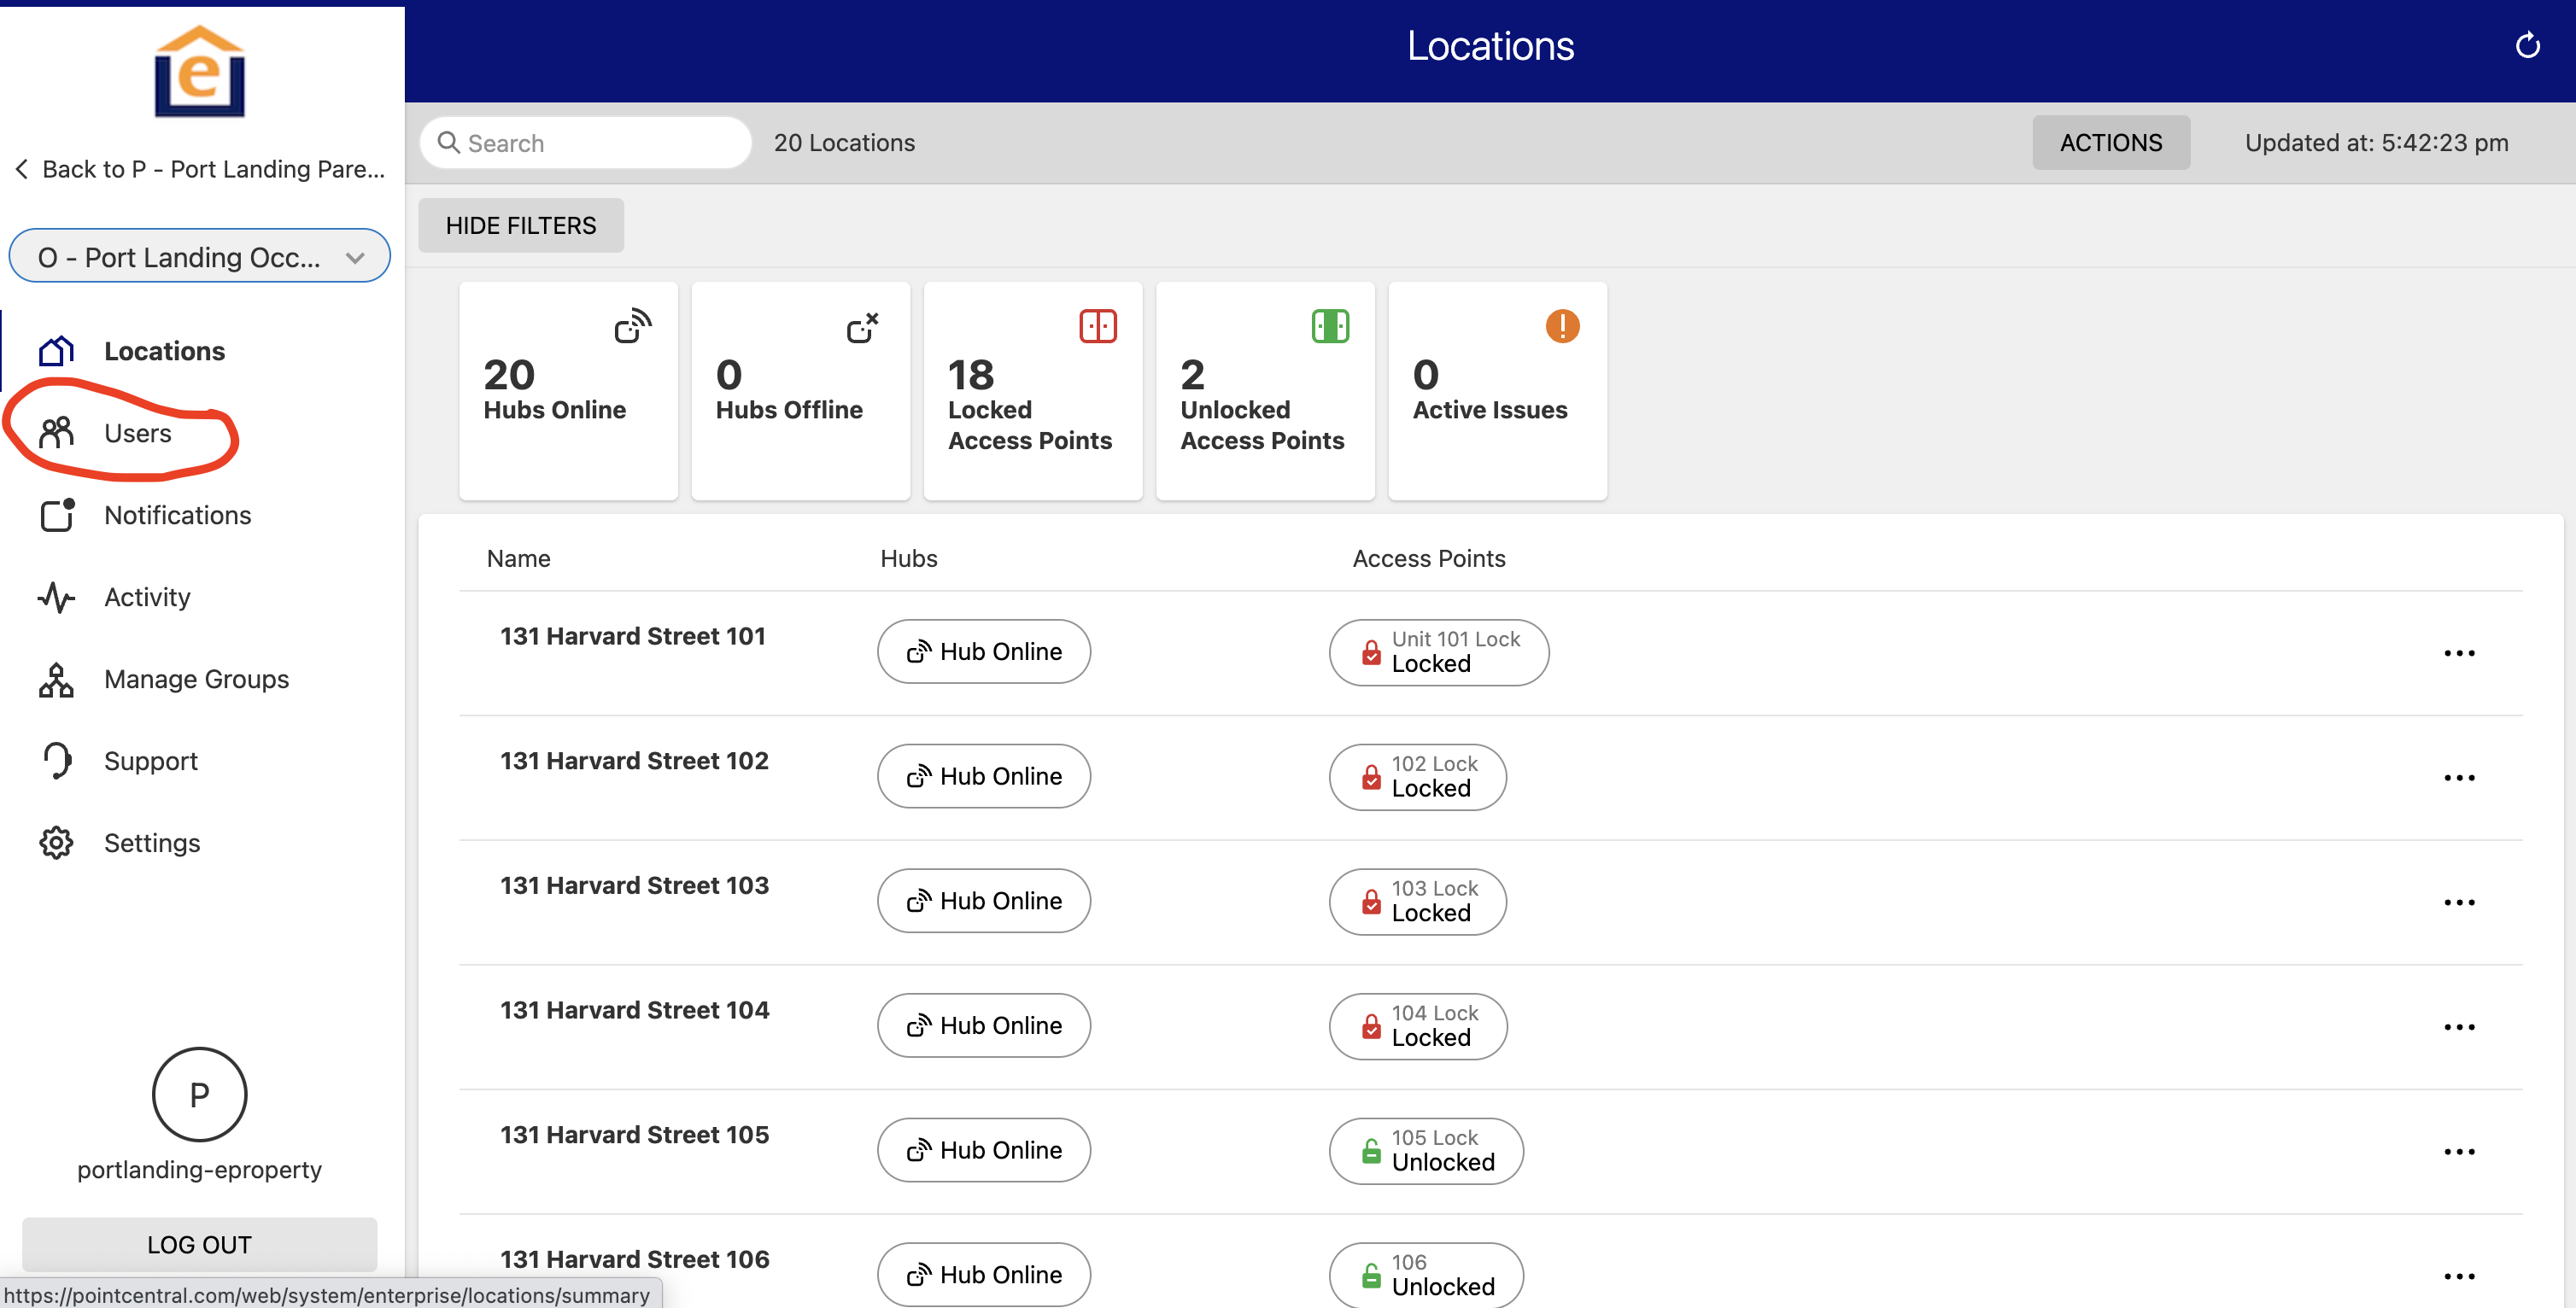
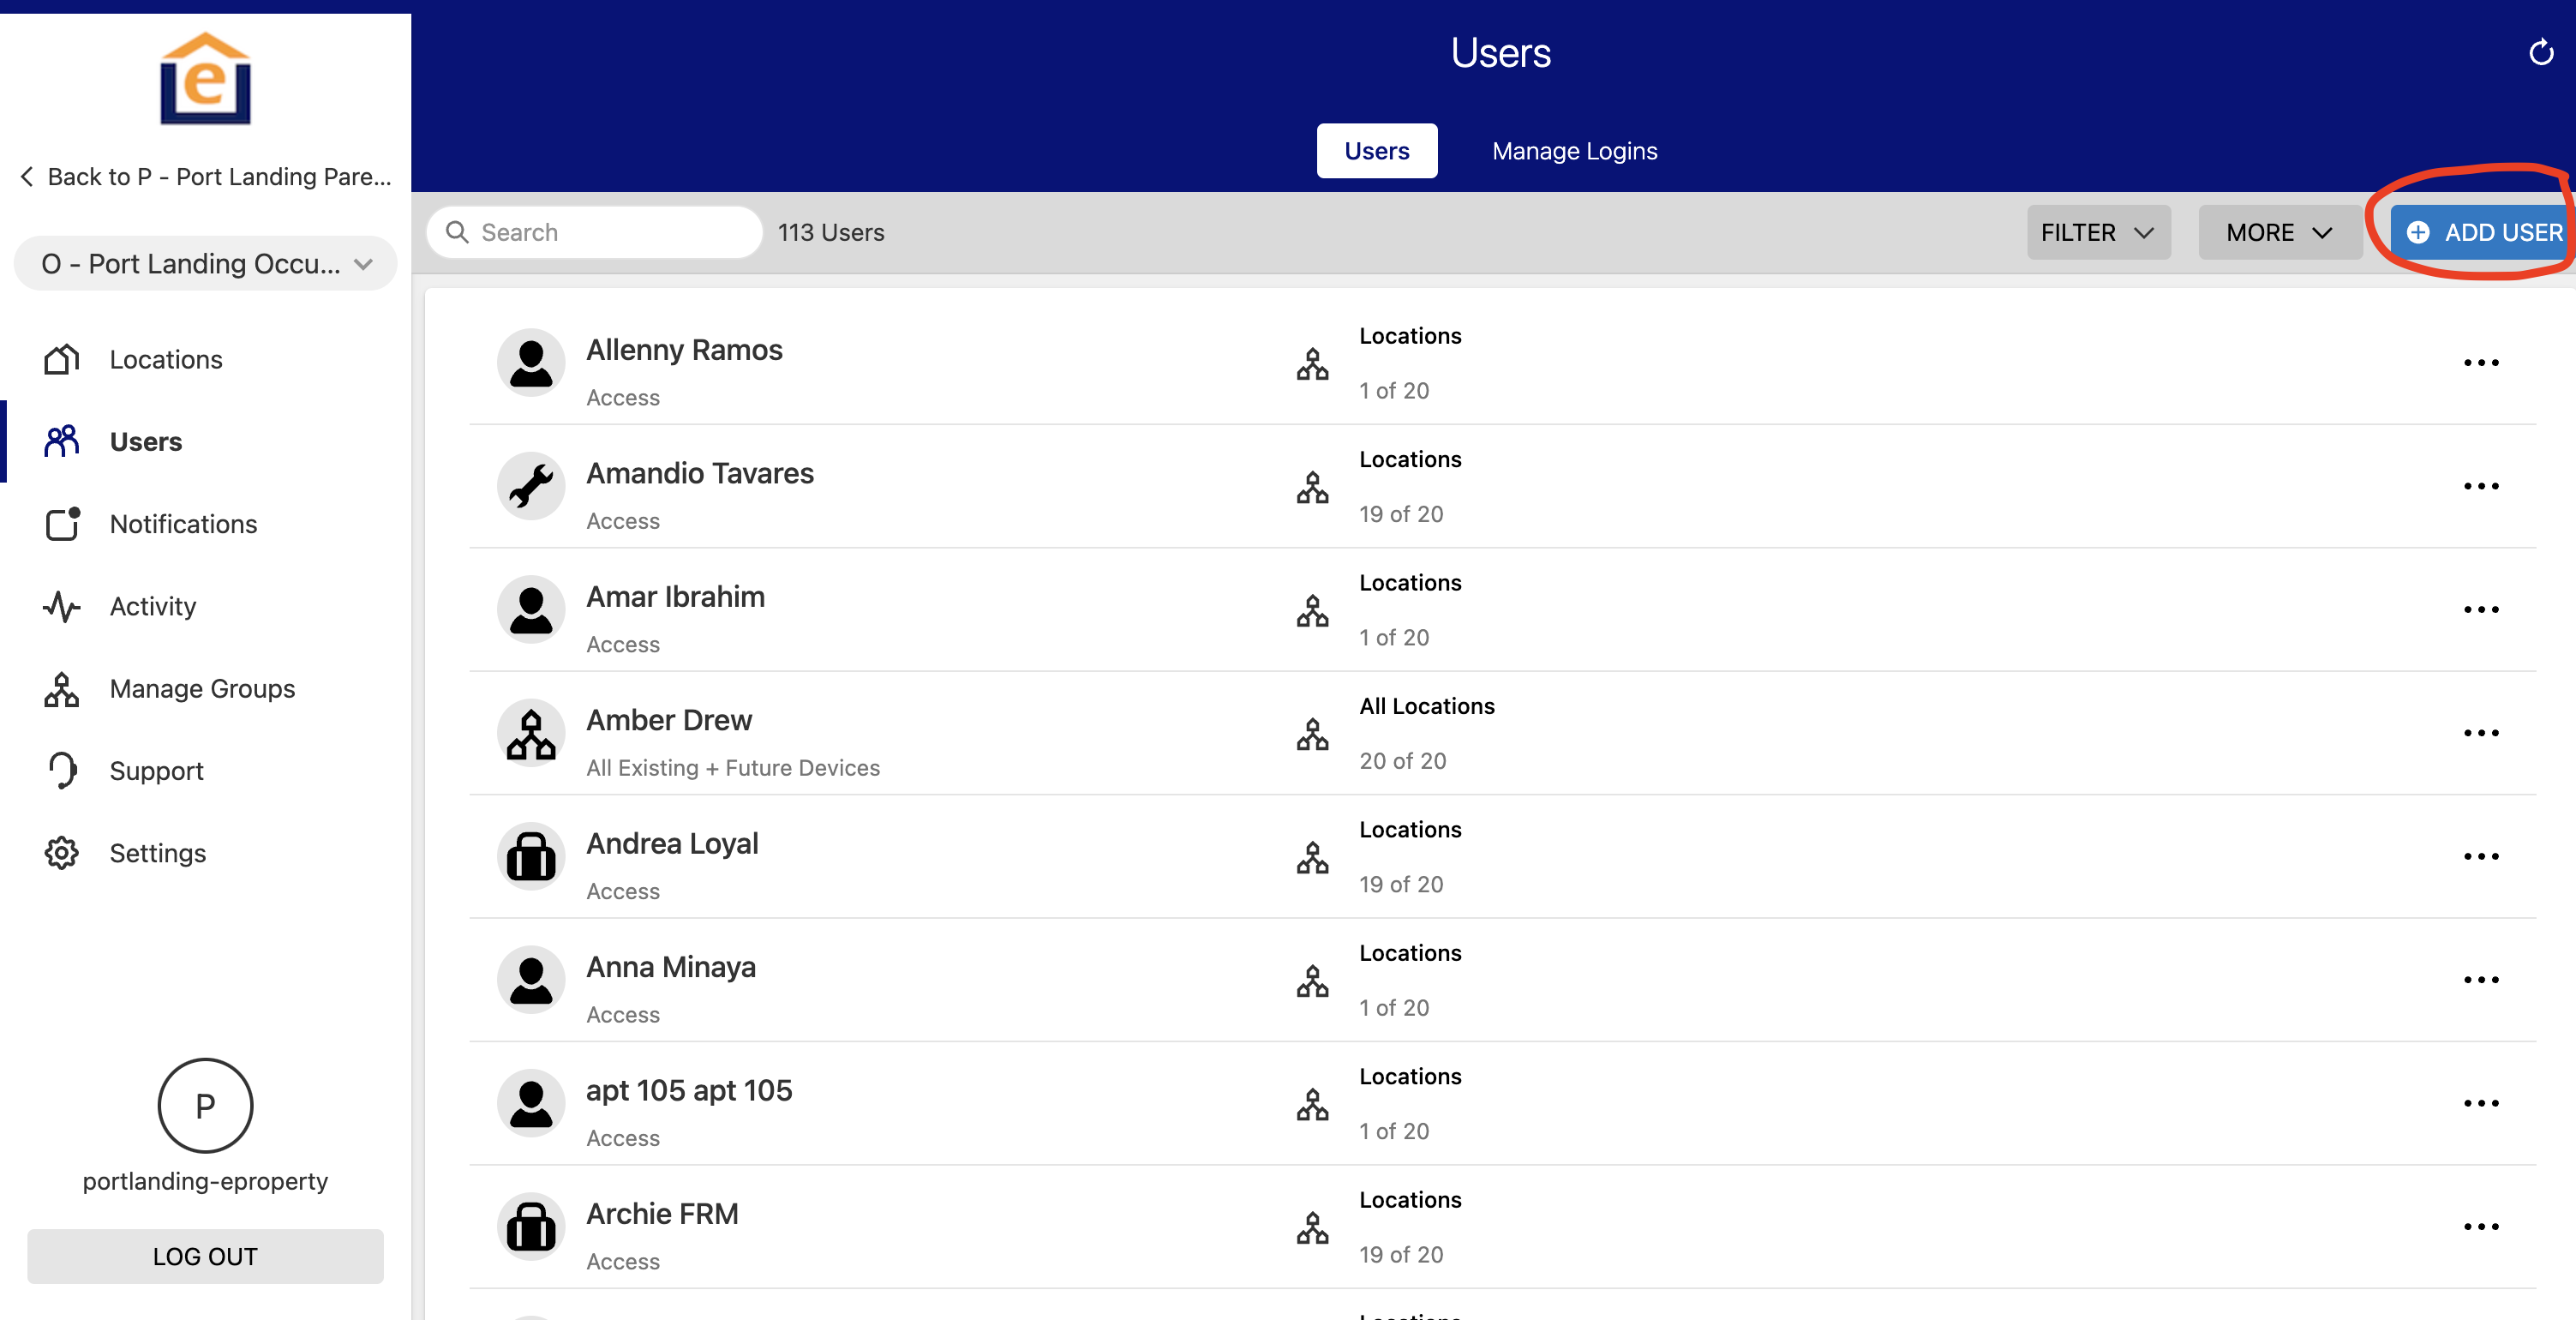
2. Click on "Users" along left, then "Add User" on the top
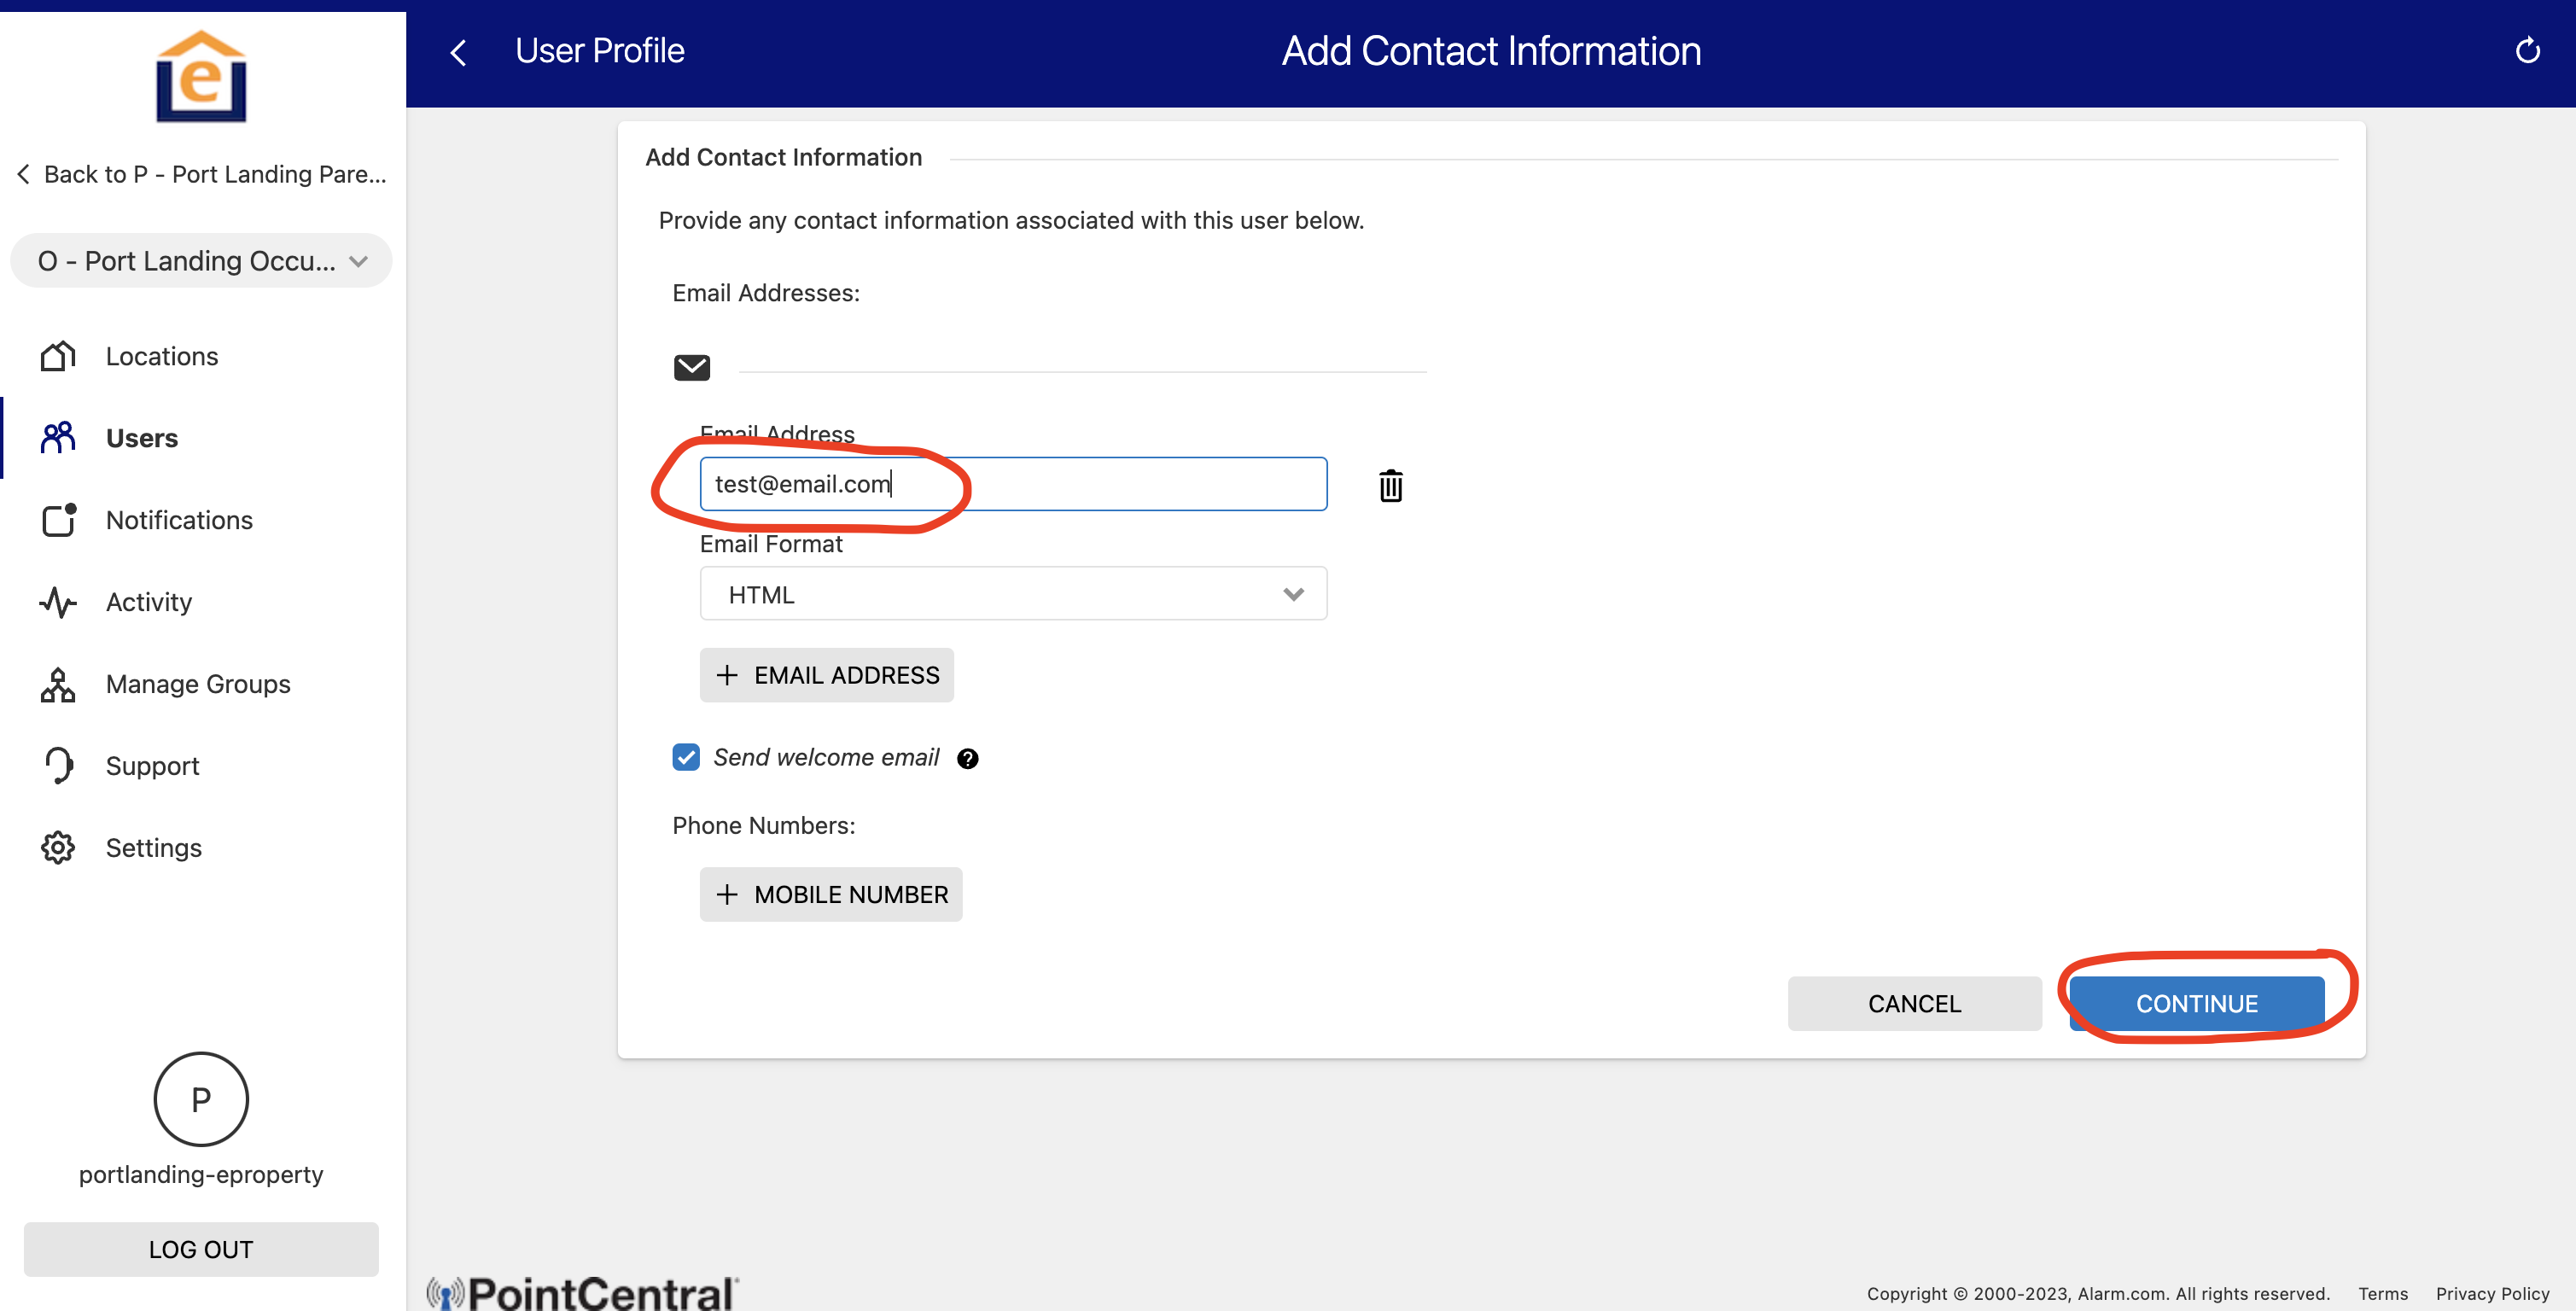
3. Enter First and Last name of the new resident. Then choose User Type = "Resident" from the drop down and click "Create". Then click on the "+ Email address" button and enter the resident email and keep "send welcome email" selected. This is important because the code will be automatically emailed to the new resident directly. If resident has no email, enter email of the property manager and they can provide the code to the resident via other means. 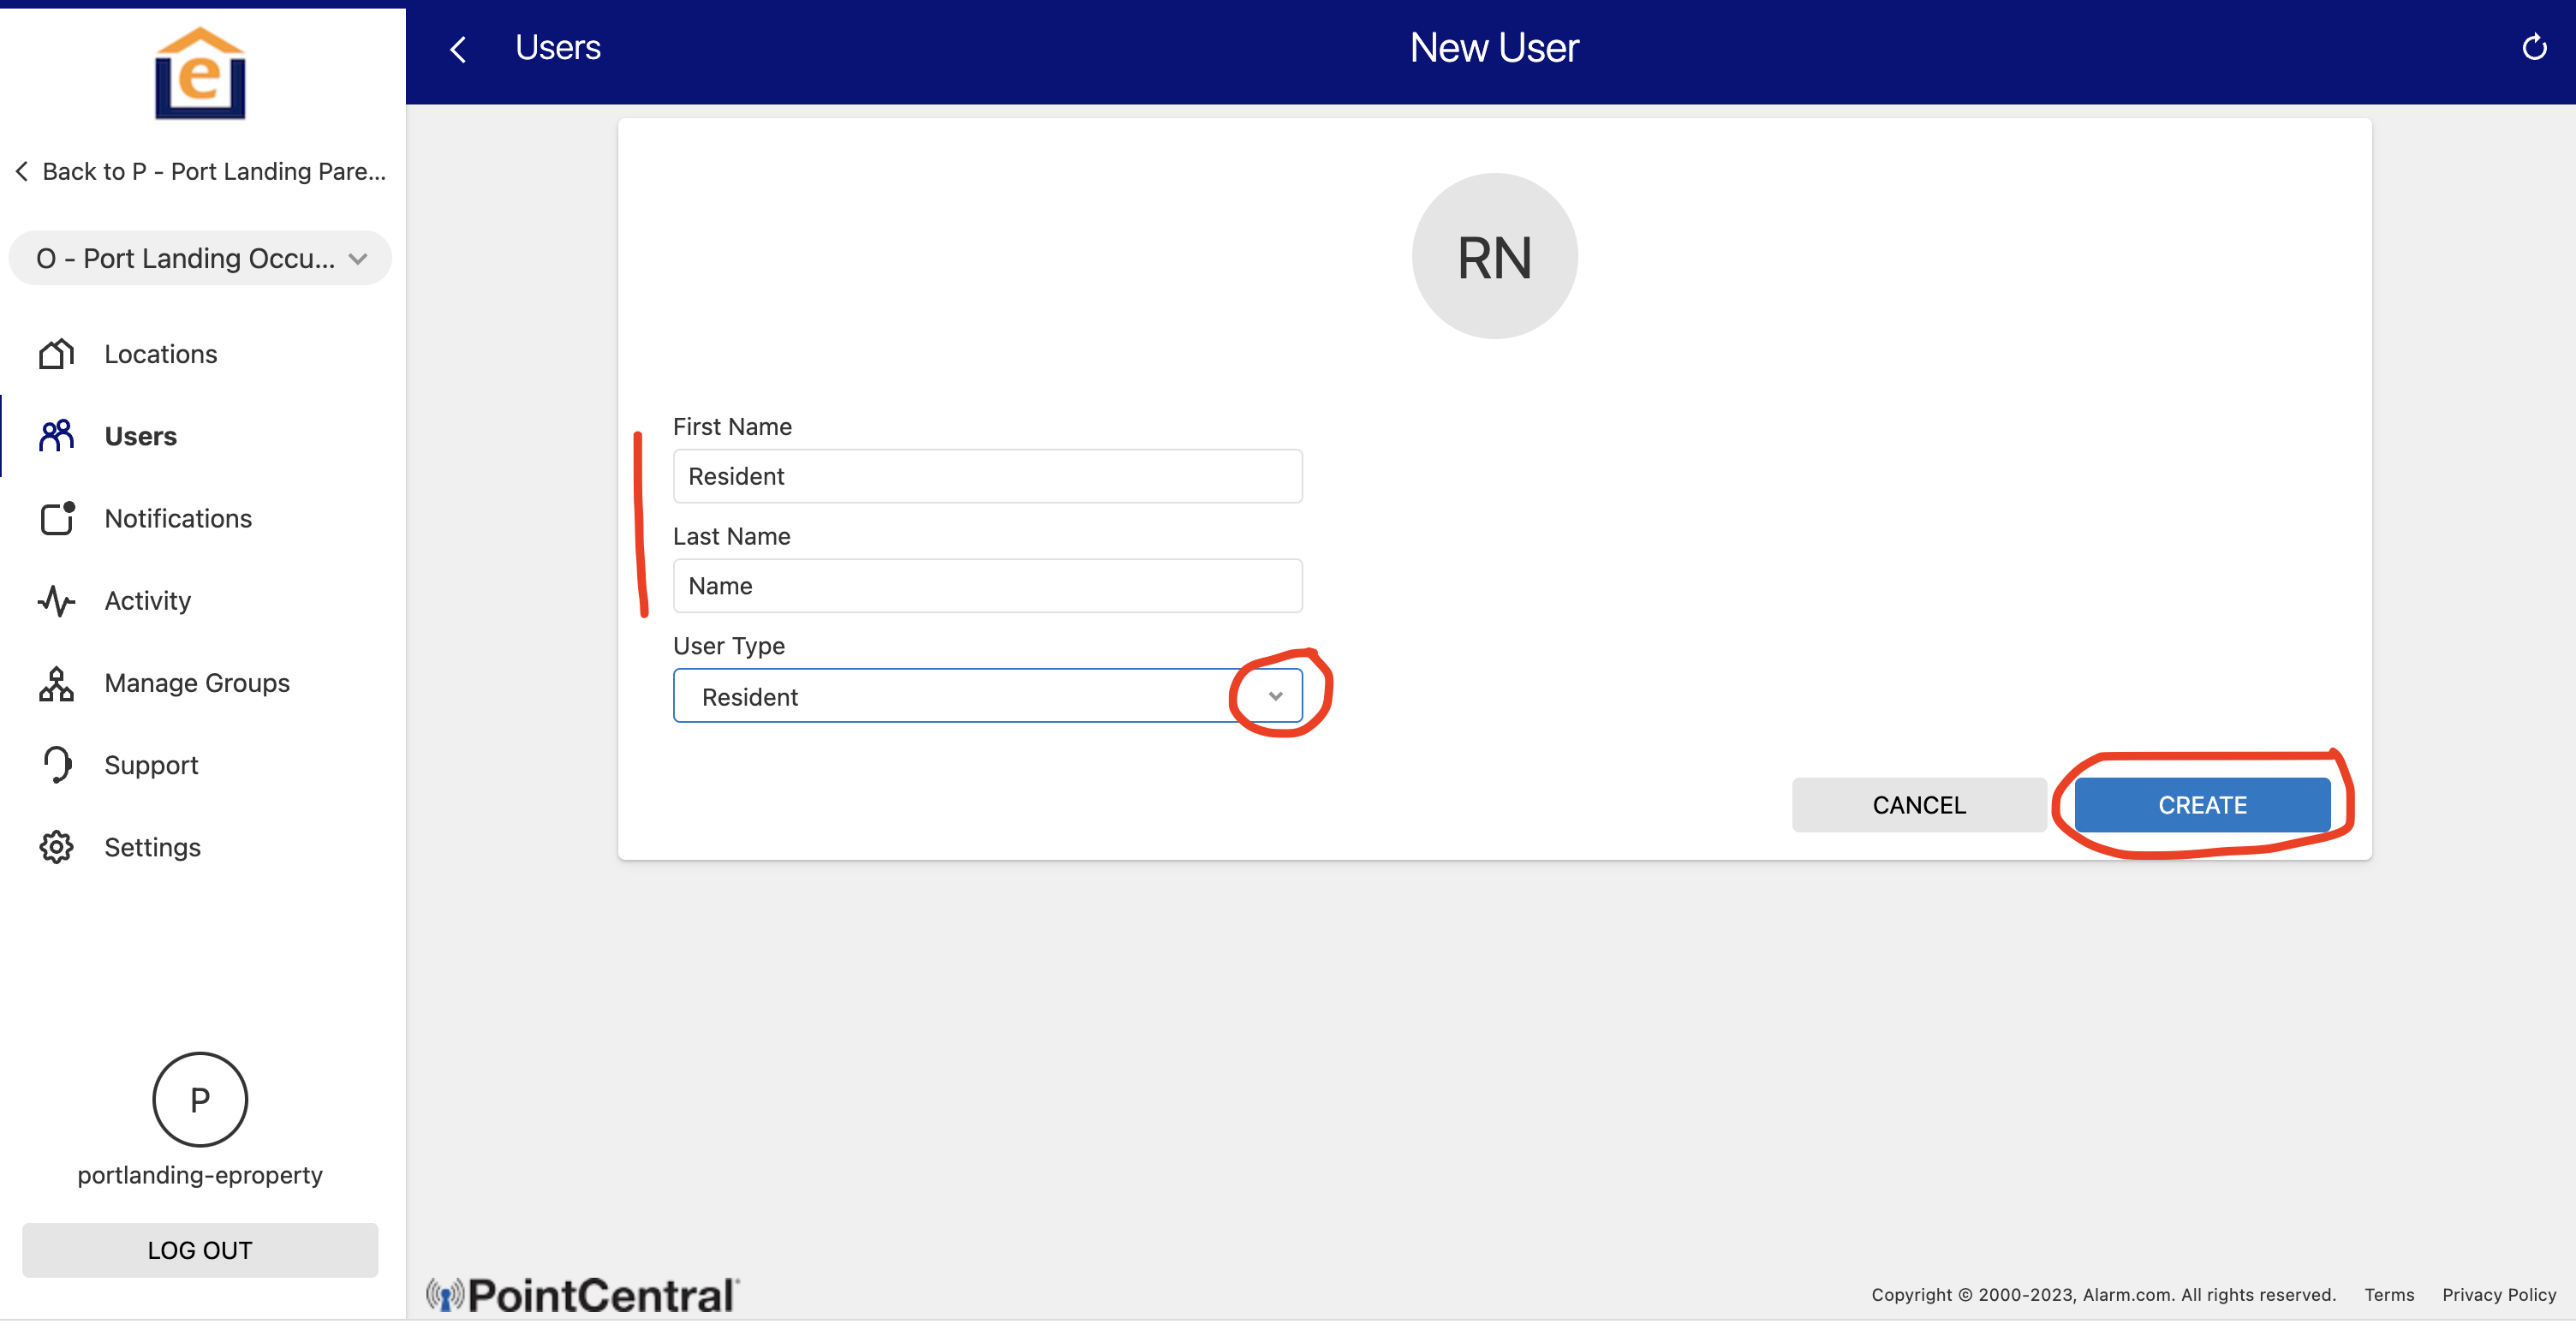
4. Then decide if this user needs Full Access to locks at all times, or a restricted schedule (only works during certain days/times), or an expiring code that ends on a specific date/time. 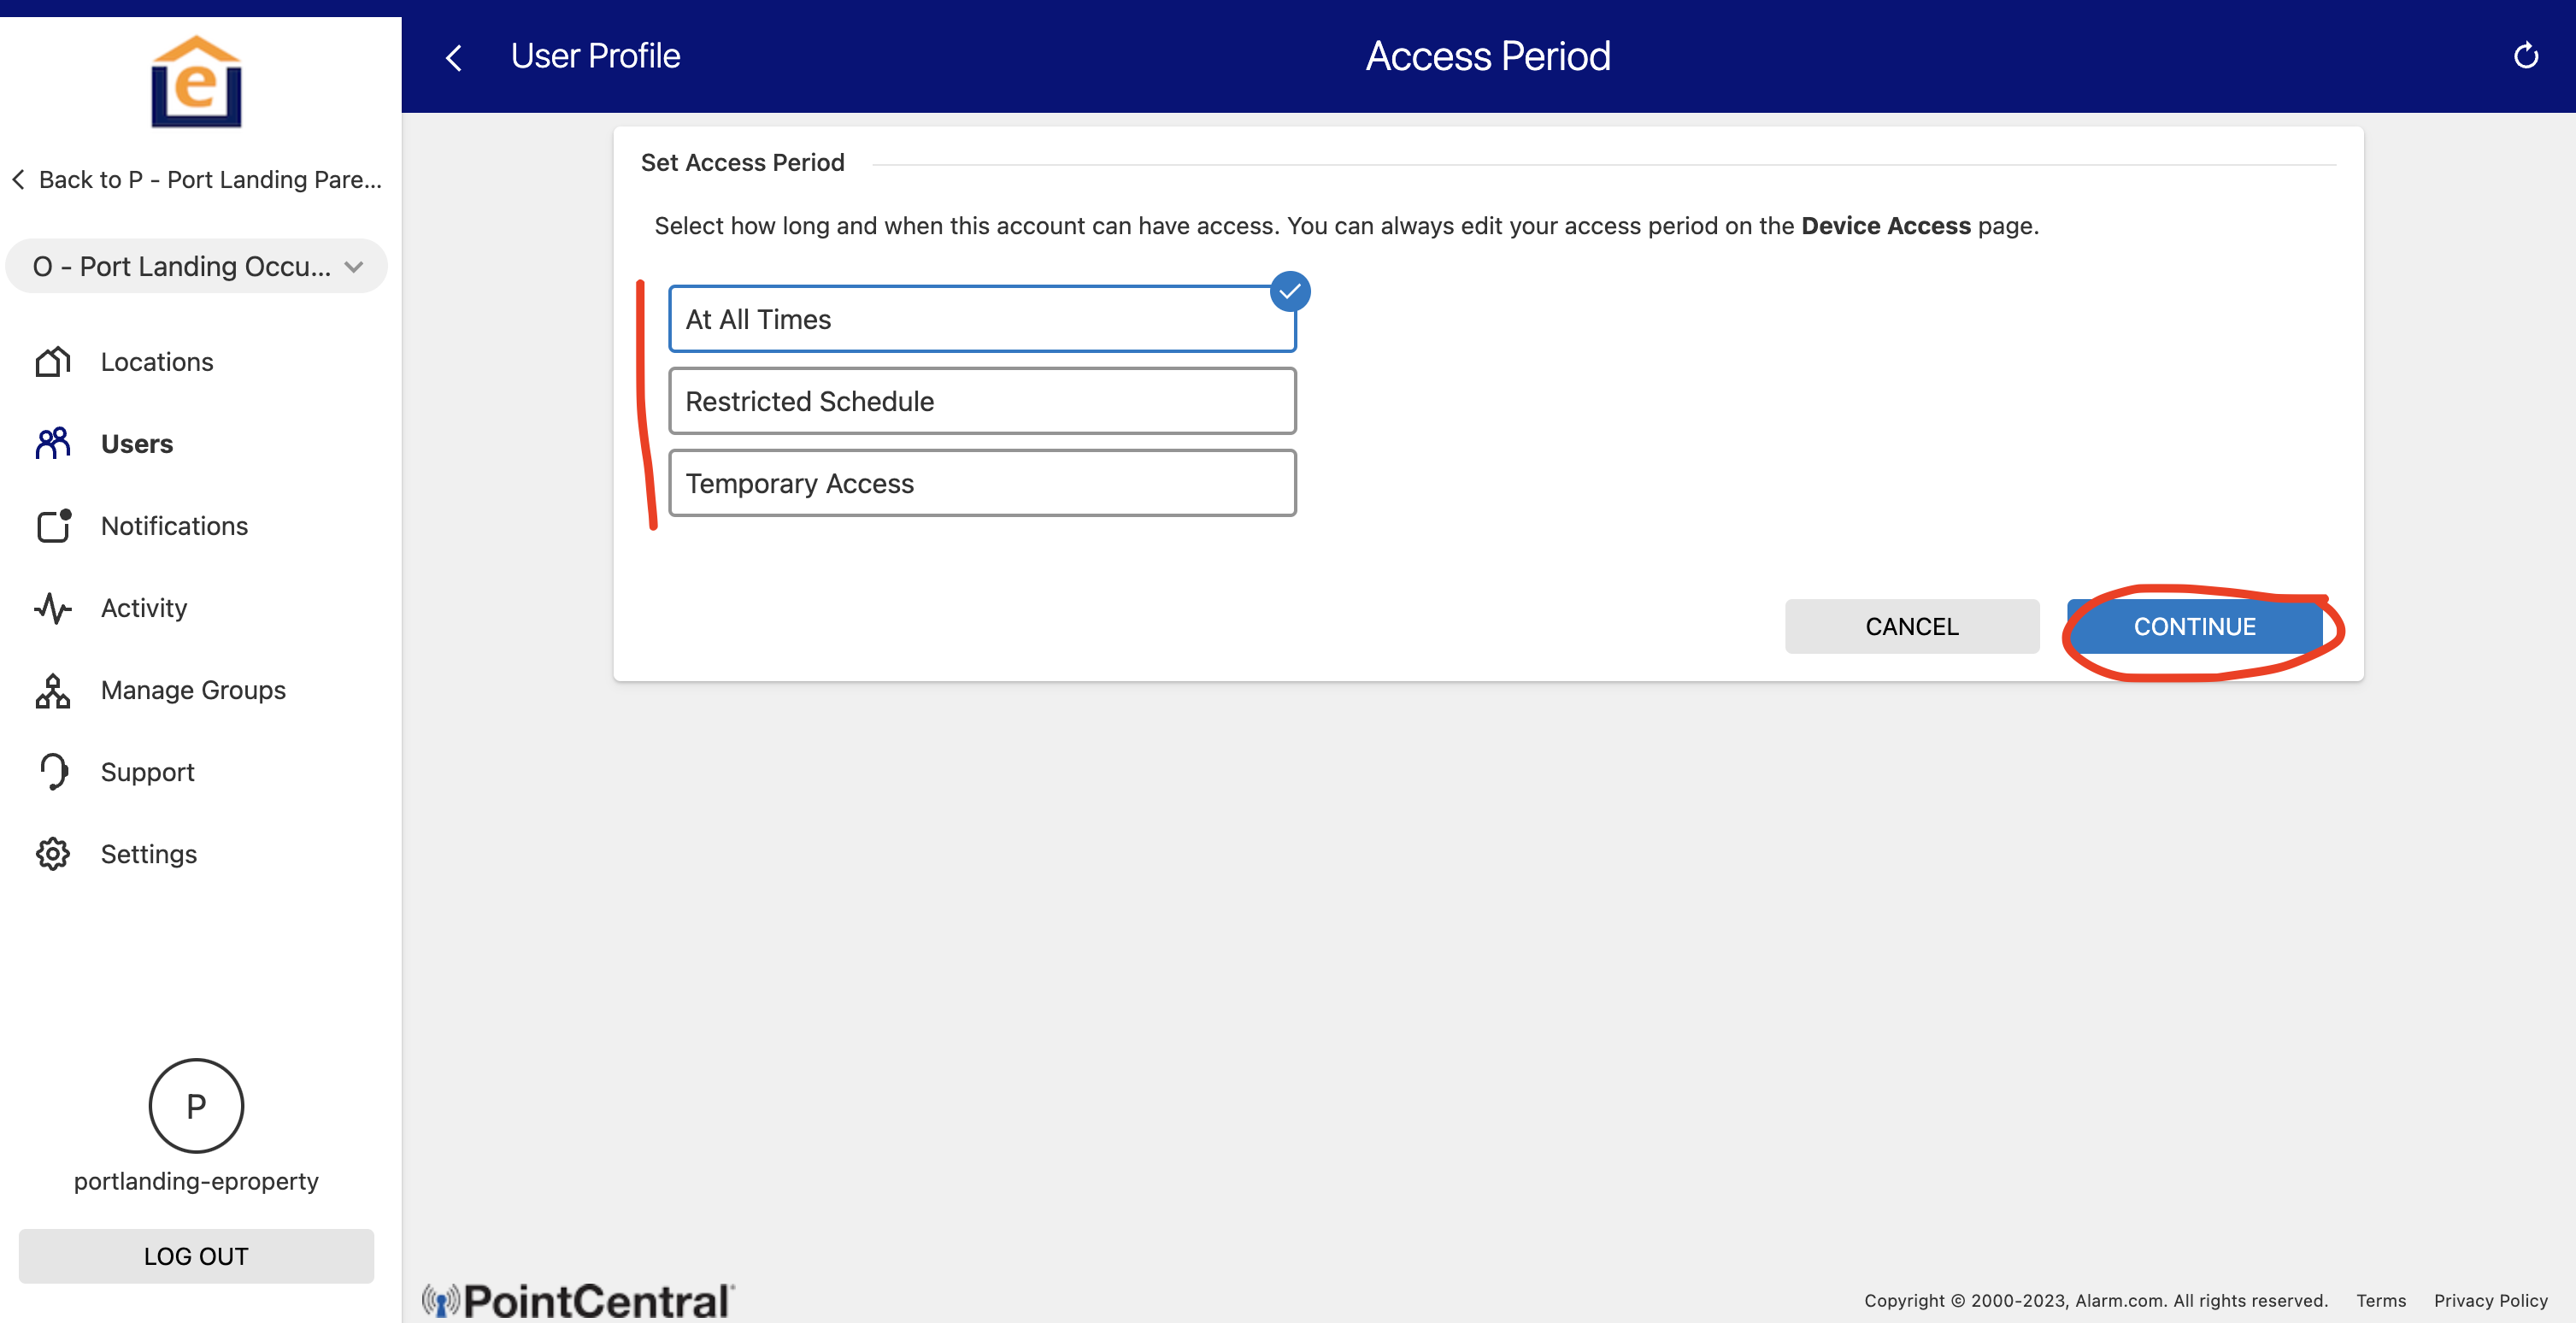
5. Then choose which lock you want to add. Select "Set by Location" and then select the lock (s) from the appropriate group that you want to give the resident access to. Note the group drop down if you want to assign the code to a lock in the Vacant group (V - [community]) or access control group (A - [community]). Most locks will be in the Vacant group for new units, or the occupied units for Occupied units. Once locks have been selected click "Save" at the bottom.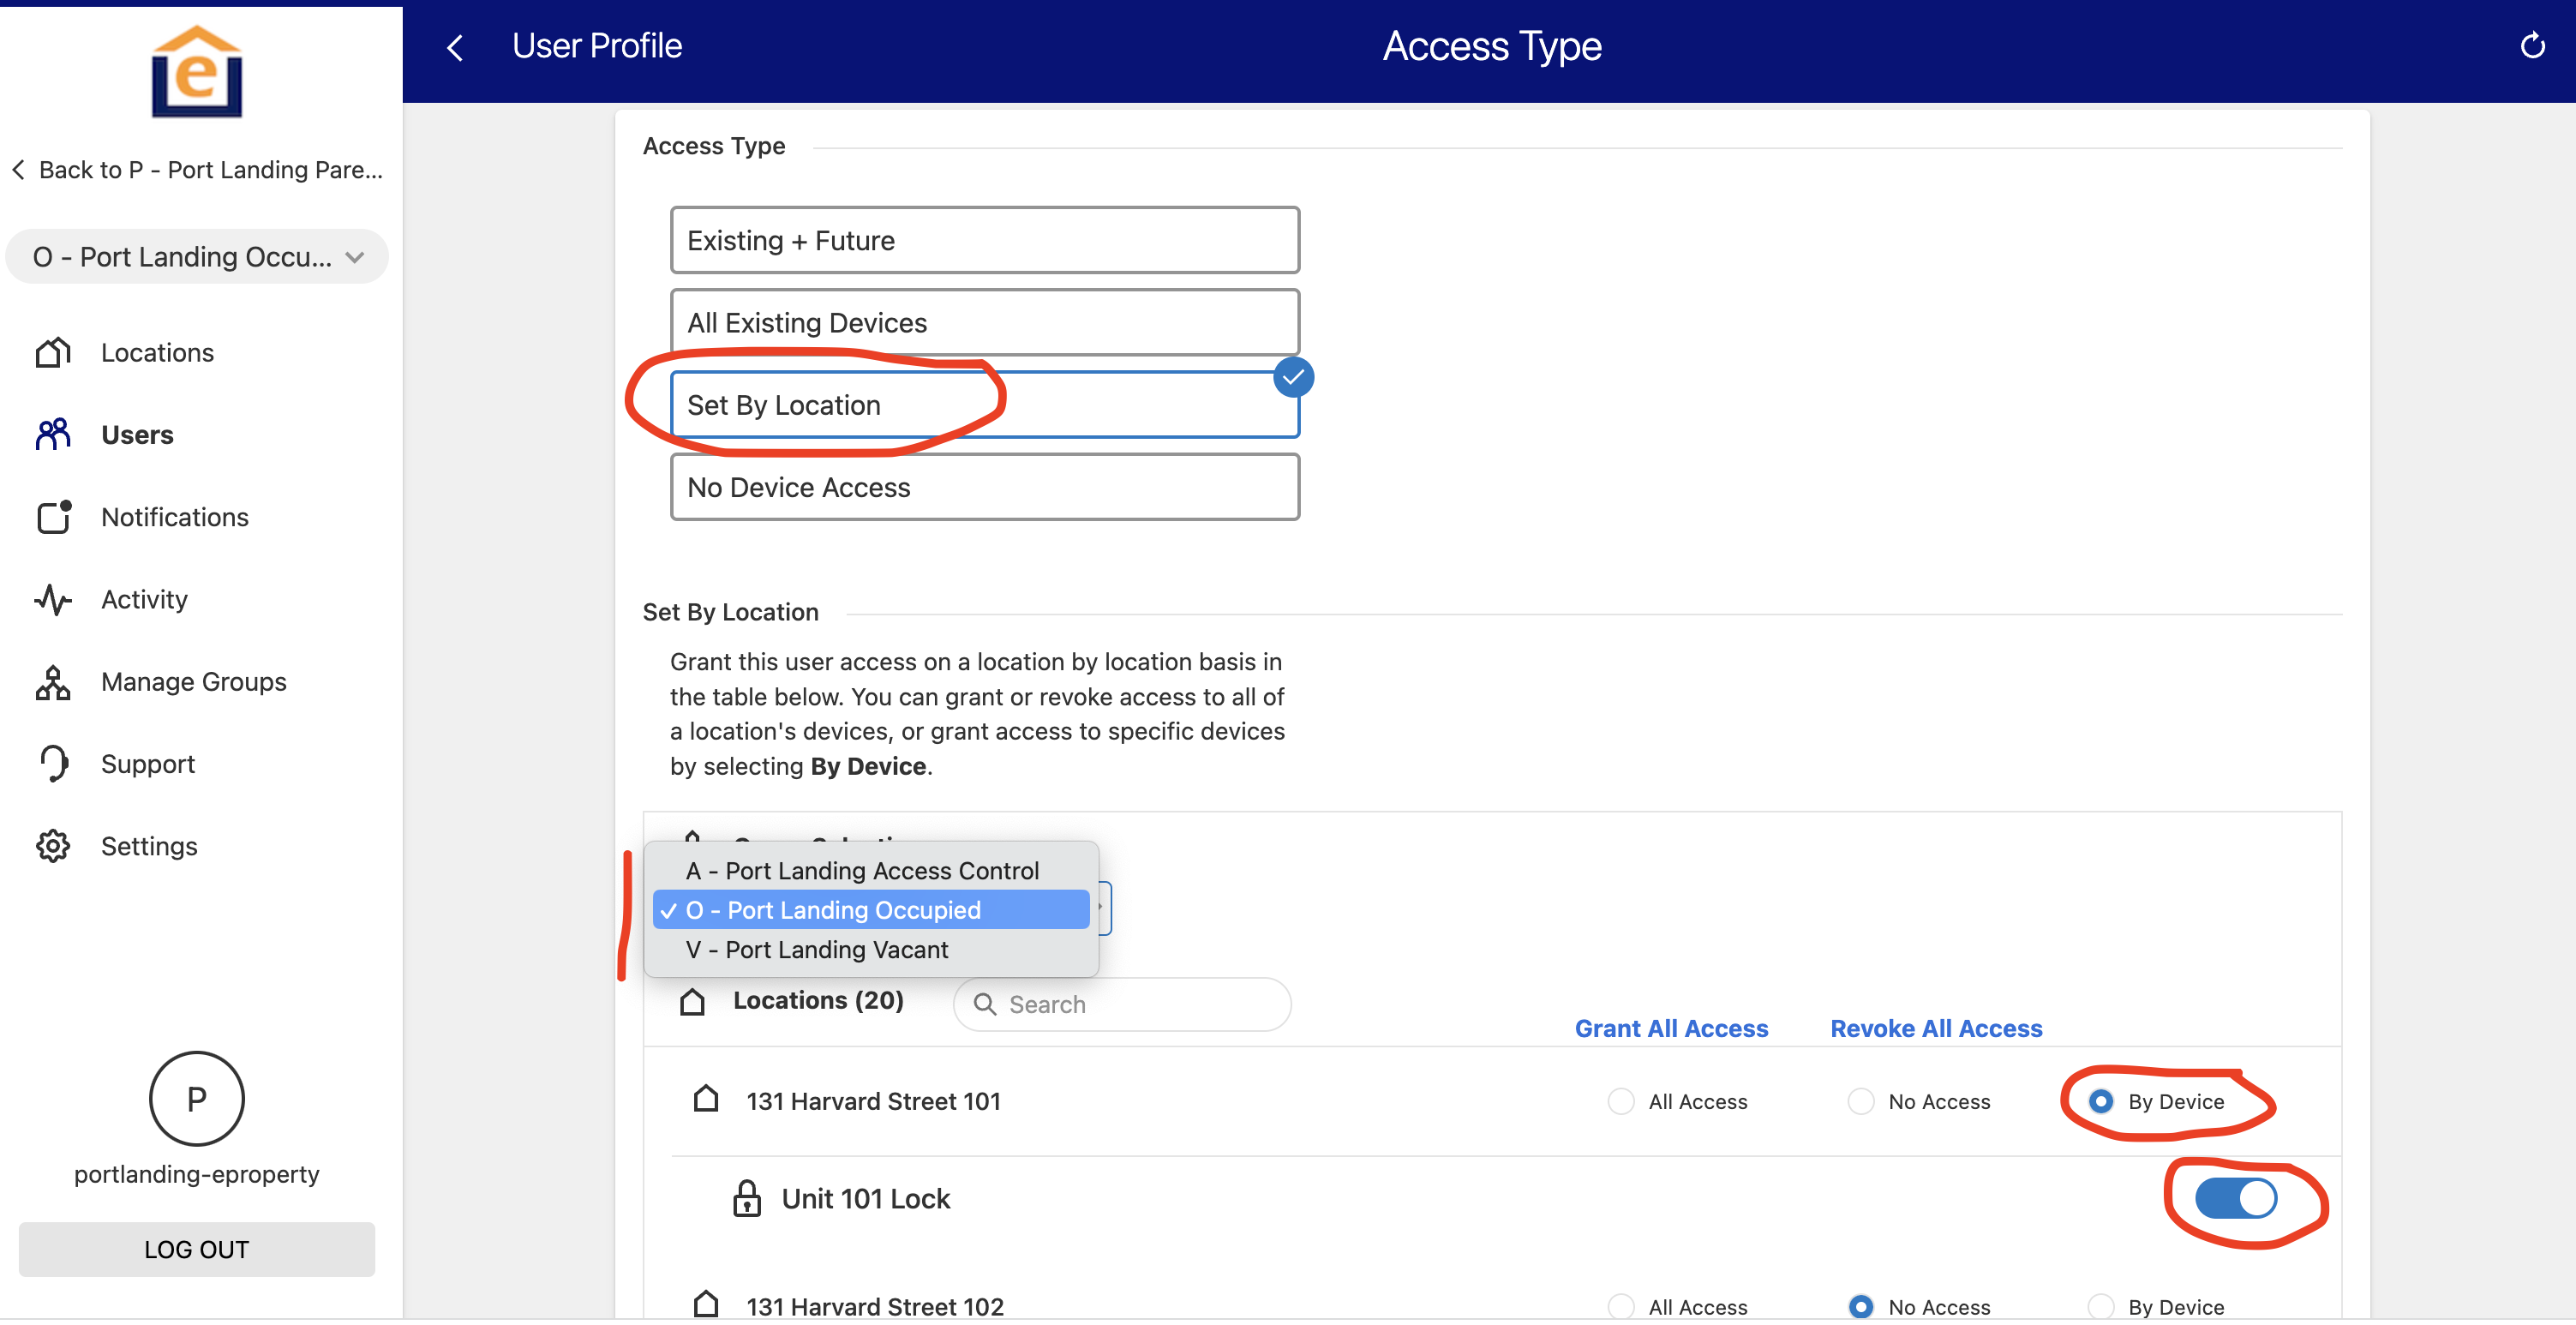
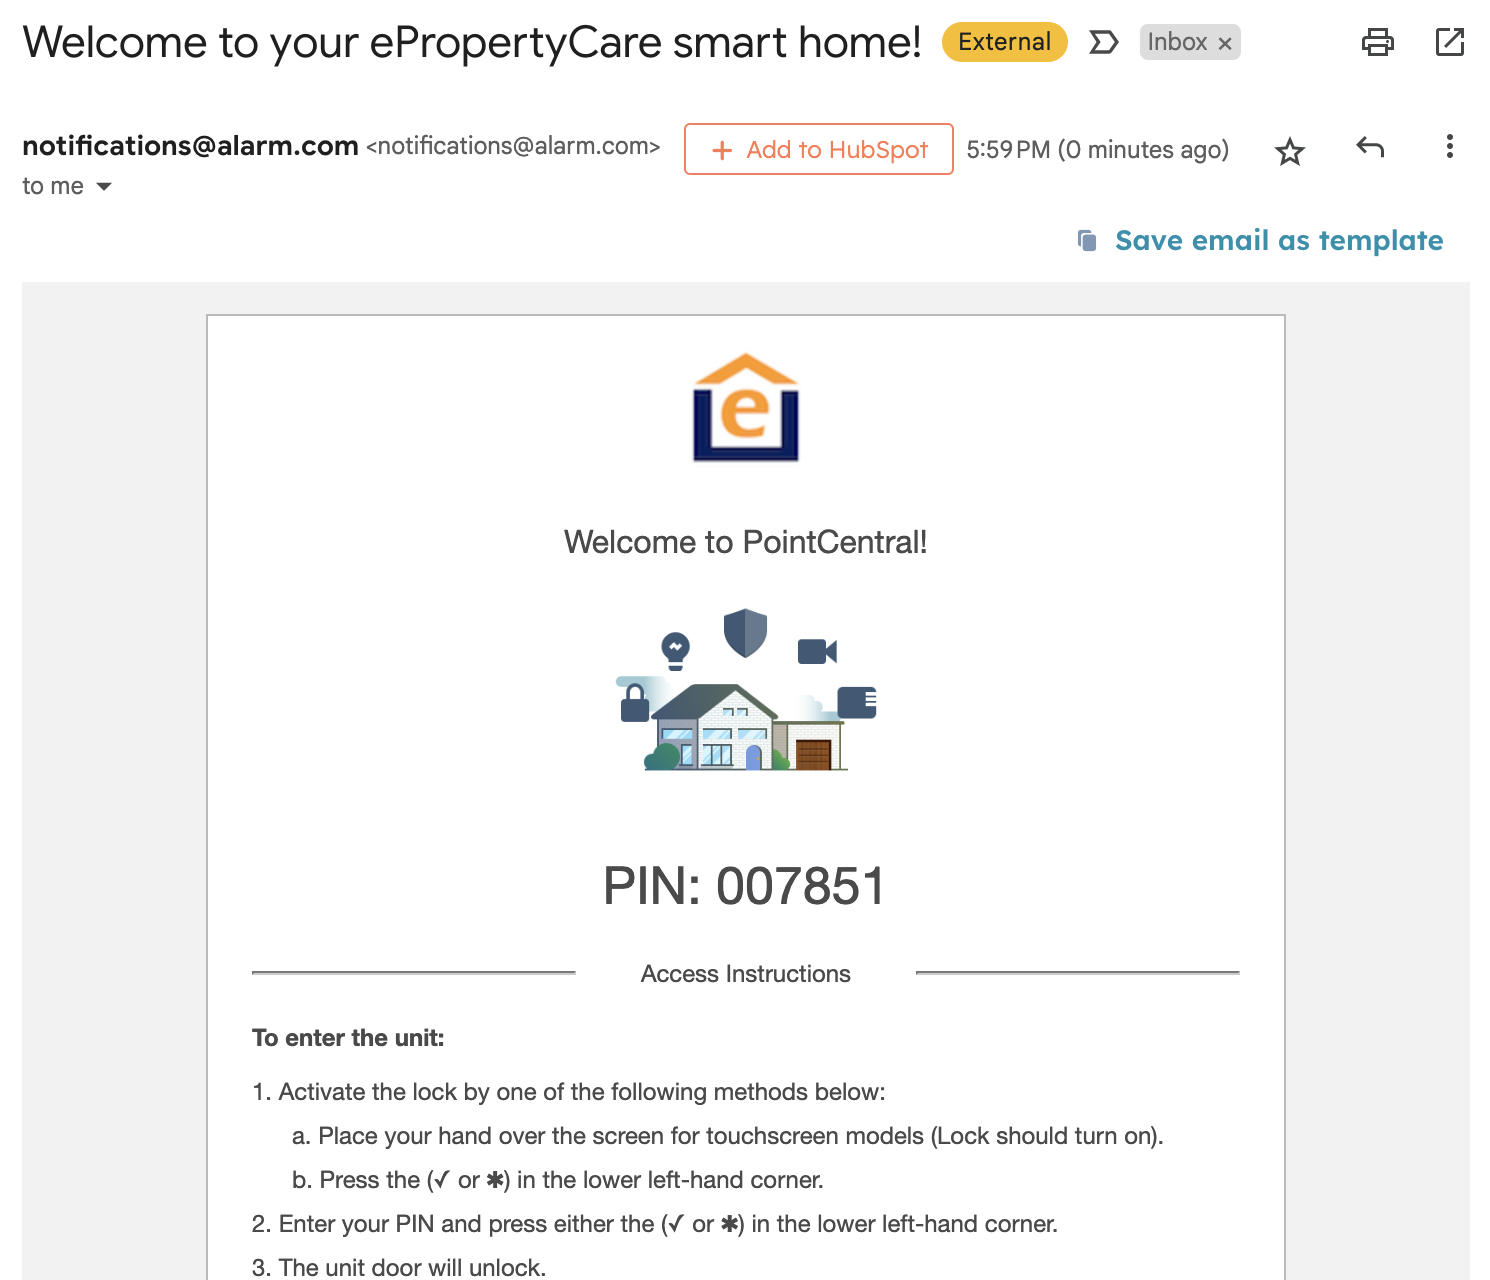
7. This will create the code and email the user. This is the email that the User will receive from "[email protected]", subject "Welcome to your ePropertyCare smart home!". It contains the address, Pin code, and instructions for how to operate the Lock. Note: sometimes the email gets caught by SPAM filter. If your resident did not receive please ask them to check their SPAM folder.
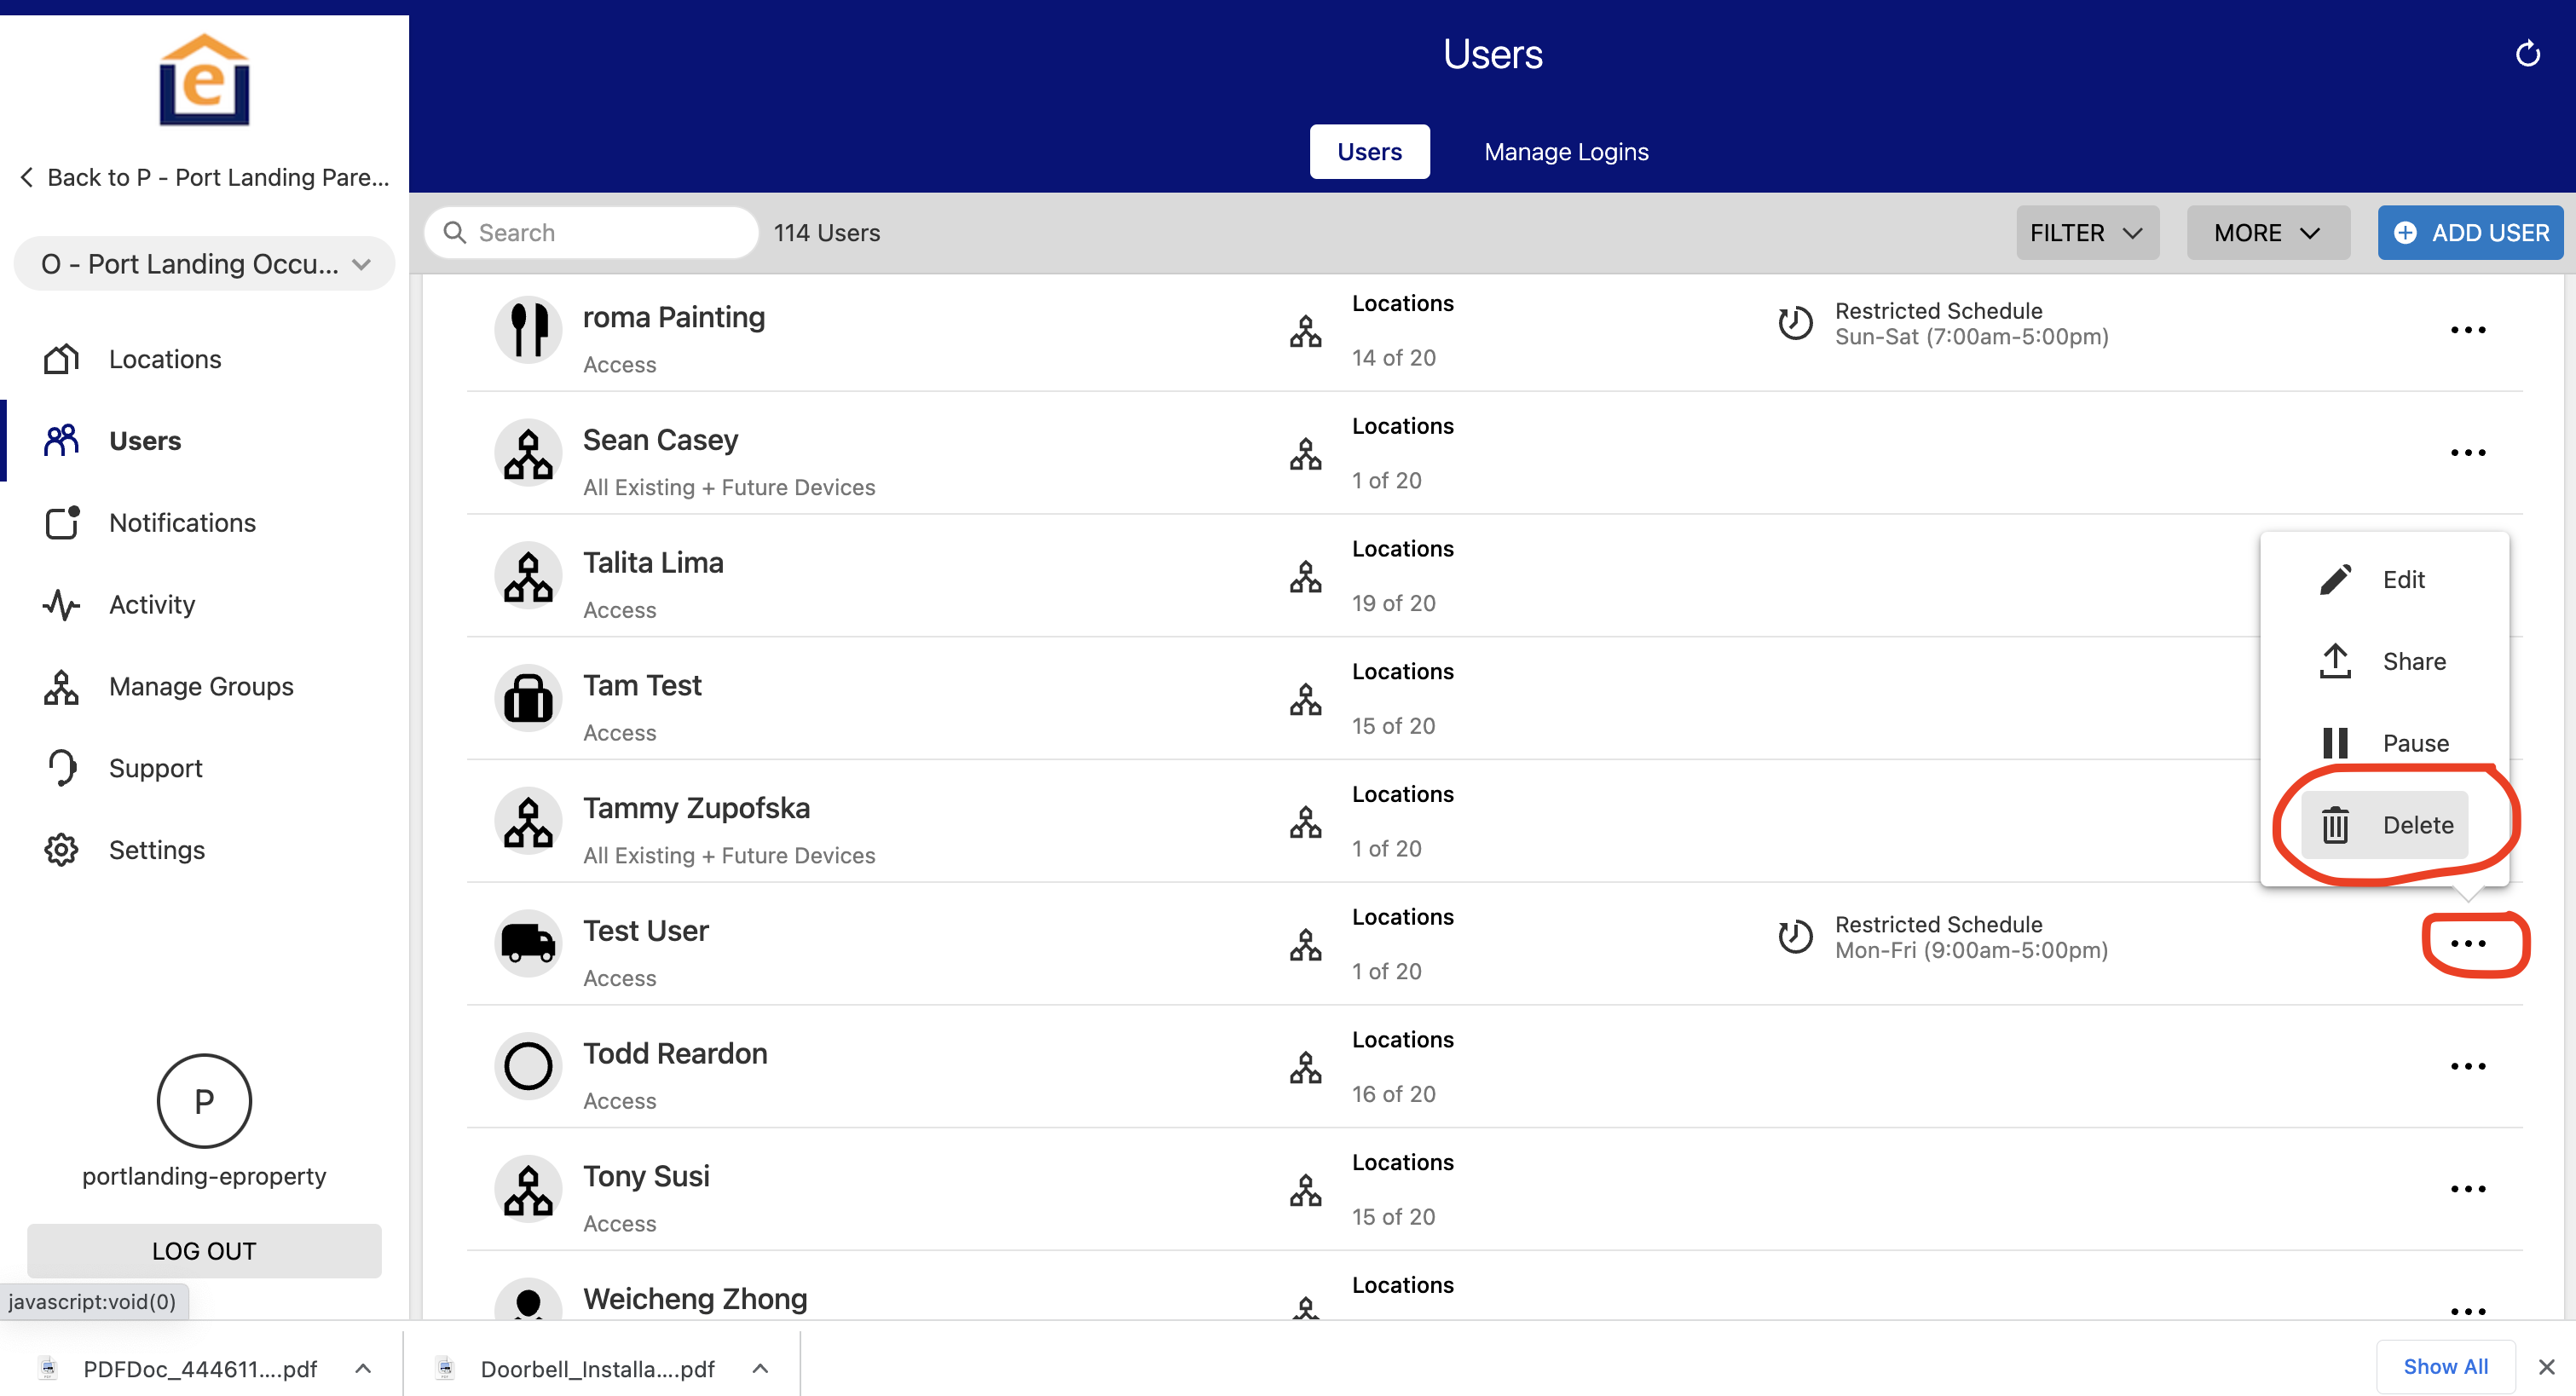
9. To delete the User, just click the "..." next to the user from the User Menu, and select "Delete". Note: If you use the resident move-in and move-out button that will handle code generation and deletion automatically. Click HERE to learn how to do this process.